"Automatic Repair Couldn't Repair Your PC": What to Do Next
The Automatic Repair screen looks alarming, but it does not automatically mean your files are gone or that the computer is beyond repair.
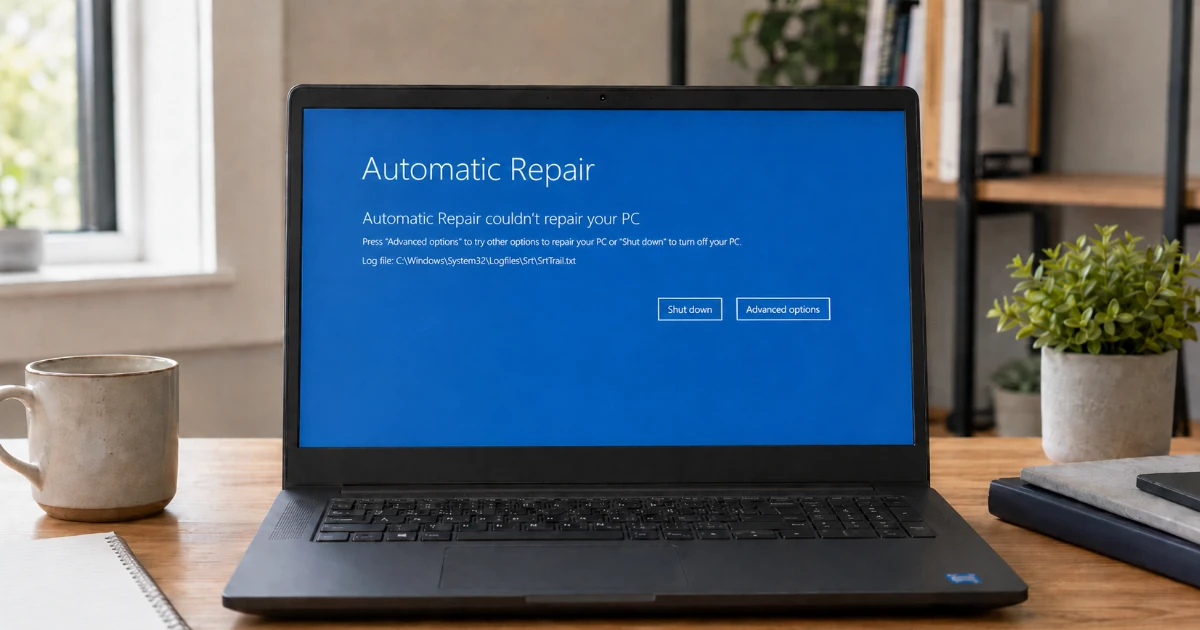
Windows may sometimes start with a blue screen saying: “Automatic Repair couldn’t repair your PC”.
You might also see “Startup Repair couldn’t repair your PC”, a reference to a log file called SrtTrail.txt, or a computer that repeatedly goes from “Preparing Automatic Repair” back to the same screen.
What it means is that Windows has detected a startup problem, tried its standard automatic fix, and has not been able to resolve the underlying cause.
The important thing now is not to panic and start pressing every recovery option. Some choices are reasonably safe to try. Others can remove programs, change files or reinstall Windows.
Before you try anything drastic
If important files are only on this computer, your priority is to protect the data before attempting resets, reinstalls or copied command-line fixes.
What does “Automatic Repair couldn’t repair your PC” mean?
Windows includes a built-in recovery area called the Windows Recovery Environment.
If the computer fails to start correctly several times, Windows may enter this recovery environment automatically. It then checks for common problems that could prevent Windows from loading.
Startup Repair can sometimes fix issues involving damaged system files, startup settings or boot information. If it cannot find or correct the problem, Windows displays the Automatic Repair message and gives you access to further recovery options.
The message identifies the symptom, not the cause.
Recent update
A Windows update may not have completed correctly.
Driver or software
A recently installed program, driver or security tool may be involved.
File-system damage
A crash, flat battery or power cut may have left Windows files inconsistent.
Hardware problem
A failing SSD, hard drive, memory fault or other hardware issue can stop Windows loading.
That is why repeatedly running the same automatic repair rarely helps. The next step is to narrow down what has happened without putting your files at unnecessary risk.
Start with these safe checks
Before opening the more advanced recovery tools, try the following.
1. Disconnect unnecessary devices
Turn the computer off and unplug anything that is not essential, including USB memory sticks, external hard drives, printers, USB hubs, memory cards, webcams and docking stations.
Leave only the power cable connected. On a desktop computer, leave the monitor, keyboard and mouse connected too.
A faulty device or a computer trying to start from the wrong USB drive can occasionally interfere with startup.
2. Try continuing into Windows once
If the recovery screen offers Continue: Exit and continue to Windows, it is reasonable to try it once.
Sometimes a temporary problem clears after a complete restart. If the computer returns to the same Automatic Repair screen, move on to the recovery options instead.
3. Photograph the screen
Take a clear photograph of the exact error message, any error code, any file name shown and the screen containing the recovery choices. Messages that appear similar can point towards very different problems.
4. Think about what happened immediately beforehand
Useful clues include:
- Windows was installing updates
- The computer lost power or the battery ran flat
- A new program, antivirus tool or driver was installed
- A driver or BIOS update was performed
- The computer crashed or showed a blue screen
- The computer had recently become slow or unreliable
Do not worry if there was no obvious trigger. Many storage and hardware problems appear without warning. If the machine had already been getting slow, our guide to finding the real cause of a slow PC may help you understand the background symptoms.
A note about BitLocker recovery keys
Before you open the advanced tools, be aware that some of them may ask for a BitLocker recovery key.
This is a 48-digit number used to unlock an encrypted drive. It is not the same as your Windows password, Microsoft account password or PIN.
The key may be stored in the Microsoft account used on the computer, in a work or school account, on a printed page, on a USB drive, or with the person or organisation that originally set up the computer. Microsoft has a guide to finding your BitLocker recovery key.
If Windows asks for a BitLocker key you do not have, stop rather than guessing or choosing options that might erase the drive.
The files may still be present, but an encrypted drive cannot simply be bypassed without its recovery information.
Which Advanced Options should you try?
From the blue recovery screen, select Advanced options → Troubleshoot → Advanced options. The exact choices vary between computers and Windows versions.
The following options are the most sensible ones to consider.
1. Quick Machine Recovery, if it appears
Some newer Windows 11 computers may offer Quick Machine Recovery.
This connects to Microsoft’s recovery service and checks whether a fix is available for a known, widespread startup problem. If no suitable fix exists, it returns you to the normal recovery options.
Because it is intended as an automated recovery tool, this is a reasonable early option to try when it is available. It is not part of Windows 10, so do not be surprised if it does not show.
2. Startup Repair
You may see Troubleshoot → Advanced options → Startup Repair.
If Windows has already displayed “Automatic Repair couldn’t repair your PC”, Startup Repair has probably already run. There is no harm in checking it once if you are unsure, but running it repeatedly is unlikely to produce a different result.
If it fails again, return to Advanced options rather than going around the same loop.
3. System Restore
System Restore can be particularly useful when the computer stopped working after a Windows update, driver installation, new program or settings change.
Choose Troubleshoot → Advanced options → System Restore. If restore points are available, select one created before the startup problem began.
Traditional System Restore rolls Windows system files, settings and installed programs back to an earlier state. It does not normally remove personal documents or photographs, although programs and drivers installed after the restore point may need reinstalling.
Not every computer will have a suitable restore point.
Do not confuse it with “Point-in-time restore”
Some Windows 11 devices may show an option called Point-in-time restore. Despite the similar name, this is more far-reaching than traditional System Restore.
It can revert the Windows drive, including local files, applications, settings and passwords, to the selected point. Restore points are short-term, up to 72 hours. I would not use it casually when important files are not backed up.
4. Uninstall Updates
If the computer stopped starting immediately after a Windows update, choose Troubleshoot → Advanced options → Uninstall Updates.
Windows may offer two choices: Uninstall latest quality update and Uninstall latest feature update.
Start with the latest quality update. This is the regular type of Windows update most commonly installed in the background. The feature-update option is more relevant when the computer has recently moved to a substantially newer Windows version.
If Windows starts afterwards, allow it to settle and back up anything important before trying the update again. If updates have been failing repeatedly, see How to Deal With Stuck Windows Updates on Windows 11.
5. Safe Mode
Safe Mode starts Windows with a reduced set of drivers and background services.
Choose Troubleshoot → Advanced options → Startup Settings → Restart, then select 4 or F4 for Enable Safe Mode.
If Safe Mode starts successfully, that is useful information. It suggests Windows itself can still load and that a driver, program, update or background service may be contributing to the normal startup failure.
What if Windows starts in Safe Mode?
Do not immediately begin deleting programs or changing settings at random.
Start by backing up anything important. Do not run Windows Update or begin a major repair until that backup is complete.
Copy essential documents and photographs to an external USB drive, OneDrive, Google Drive or another trusted storage location.
Once the important files are safe, consider what changed immediately before the problem started. You may be able to remove a recently installed program, third-party antivirus product, recently added device driver or update that appears to have triggered the problem.
Then restart the computer normally.
If it still fails, Safe Mode has at least shown that the Windows installation and storage drive remain partly accessible. That makes proper diagnosis easier.
If a third-party security suite was recently installed or updated, our guide to McAfee, Norton and Windows Security explains why overlapping security software can create problems on home PCs.
Recovery options to treat carefully
The recovery menu includes several choices that sound reassuring but can have significant consequences.
Reset this PC
Reset this PC reinstalls Windows. It normally offers Keep my files and Remove everything.
“Keep my files” is safer than “Remove everything”, but it does not return the computer exactly to its previous condition. It removes installed programs and resets many settings, even though it is intended to preserve personal documents and photographs.
A reset can also fail if the storage drive or Windows recovery files are damaged.
I would not use Reset this PC as an early troubleshooting step when important files are not backed up, the health of the drive is unknown, the computer has recently become very slow, or installed business software and specialist settings need preserving.
Reset is a recovery option, not a harmless repair button.
Command Prompt
The recovery menu may include Command Prompt.
There are legitimate commands that can repair Windows startup information, file systems and offline system files. The difficulty is that instructions found online often assume a particular disk layout.
Inside the recovery environment, Windows may not be assigned the usual C: drive letter, BitLocker may prevent access, recovery and system partitions can look similar, and a command intended for one configuration may be inappropriate for another.
This is why I have deliberately not included a page of bootrec, bcdedit, diskpart, DISM and CHKDSK commands here.
A copied command can appear to run successfully while repairing the wrong installation or altering the wrong partition. If you are not completely sure what a command targets, this is the point to stop.
Changing BIOS or UEFI settings
Avoid changing settings such as Secure Boot, UEFI or Legacy mode, SATA or storage-controller mode, TPM settings, boot partitions or RAID settings.
A random BIOS change may introduce another startup problem or trigger a BitLocker recovery request. The exception is checking whether the SSD or hard drive is detected at all. Even then, avoid saving changes unless you know exactly what has been altered.
Booting from a Windows USB installer
A Windows installation USB can be useful for accessing recovery tools or reinstalling Windows, but it is not automatically a non-destructive repair method.
The repair installation that preserves programs, settings and files is normally started by running Windows Setup from inside a working Windows installation.
Booting directly from the USB usually takes you towards a fresh installation. Do not select partitions, format drives or begin an installation merely to see what happens.
When the only copy of important data is on the computer, secure that data before attempting a reinstall.
When to stop and get help
Stop experimenting if any of the following apply:
- Important files exist only on this computer
- You do not have the requested BitLocker recovery key
- The SSD or hard drive is not consistently detected
- The drive makes clicking, grinding or unusual repeated noises
- The computer repeatedly freezes during recovery
- Safe Mode also crashes or fails to load
- The computer keeps showing different blue-screen errors
- System Restore and uninstalling the latest update have failed
- Reset or reinstall appears to be the only remaining option
- You are unsure which drive, partition or Windows installation is being changed
Continuing with increasingly aggressive repairs can make data recovery more difficult, particularly when the storage drive itself is failing.
Are my files still there?
Often, yes.
A computer can fail to start even though its documents, photographs and other personal files remain intact on the drive.
However, the Automatic Repair screen cannot tell you whether the drive is healthy. It also cannot guarantee that files will survive a reset, failed repair or reinstall.
The sensible order
- Check the health of the storage drive
- Secure the important data
- Diagnose the startup failure
- Repair or reinstall Windows only when the data is safe
That order may feel slower, but it avoids turning a Windows problem into a data-loss problem.
What if Windows starts again?
A single successful startup is encouraging, but do not assume the problem is completely resolved. Once Windows is running:
- Back up important files straight away
- Restart the computer again to confirm it starts reliably
- Check Windows Update and the health of the SSD or hard drive
- Look in Windows Reliability Monitor for recent failures
- Remove any program or driver clearly linked to the problem
- Make sure there is enough free storage space
If Windows remains unstable, investigate the cause rather than waiting for the Automatic Repair loop to return. For broader first steps, see Common Computer Problems and the Sensible Things to Try First.
Need help with a computer that will not start?
At Marple Tech Help, I regularly diagnose PCs and laptops that will not load Windows, are stuck in an Automatic Repair loop, show repeated blue screens, fail after an update, need important files secured before repair, or may have a failing SSD, hard drive or memory.
I can check the condition of the drive, protect important files where possible, identify whether the problem is Windows or hardware, and explain the sensible repair options.
A clean installation is not automatically the answer. Where Windows can be repaired safely without wiping everything, that is usually the better place to start.
When getting in touch, it helps to send a photograph of the error screen, the make and model of the computer, what happened immediately before the problem began, and whether important files are backed up elsewhere.
Stuck in an Automatic Repair Loop?
I can diagnose the startup problem, check whether the drive is healthy, secure important files where possible, and explain the safest repair options.
Send a photo of the error screen if you can. It often helps narrow down the next step.
I’m based in Marple and cover Stockport, SK6 and the surrounding area.